Friday, 31 October 2014

Painting Tips

In my usual Saturday morning with the kids, I tend to do a quick browse of some of the Wargaming sites I have saved to my favourites bar. Things like Flames of War, DUST and I also have a good browse of www.wwpd.net/ to see whats been happening in the last week or so over there.

This morning has an article from Dirty Jon which is bloody awesome:


Dirty Jon's Basic Tips For Painting Miniatures


This has some great tips and even if you've been painting plastic/resin/metal crack for years, there are some really good ideas and little tricks of the trade which can make life easier.

So if you have 5 minutes, give it a read. Careful though, you'll end up spending half an hour on the site reading other stuff!

A Dirty Jon Tiger....because who doesn't love Big Cats!

Tuesday, 28 October 2014

SAGA Drama!

Well, I don't think that anyone could call the members of TCOW slow on moving once a decision has been made! What started as a post of Monkey's Jordanian tanks on Facebook ended up being a quick decision for at least half a dozen of us to start playing SAGA which is something that had been talked about but never moved on.

So, what is SAGA I hear you ask? SAGA is a Dark Ages skirmish level game where you (as a Warlord) command a band of troops against a similar band. Featuring groups such as the Normans, Vikings and Scots, there is plenty of room for diverse forces to do battle and with new expansions coming out pretty regularly (the latest one covering the Crusades), you can do almost anything. As you only need about 20-30 figures, its pretty cheap (relatively speaking) to get into.

There is a series of videos (link below) from some Aussie guys called Knights of Dice showing how to play the game, so if you're interested, have a look before committing and then join us in the SAGA!

https://www.youtube.com/playlist?list=PLZ3wfiPbNx4QfnYNekveODsZXCBNDc7lZ


Thursday, 23 October 2014

Market Garden - The Final Battle!

As many of you will know (and if you don't, where the hell have you been?!) we've been running a Firestorm: Market Garden campaign at the club with the intent of concluding the campaign with a MEGA-BATTLE at FlamesCon.

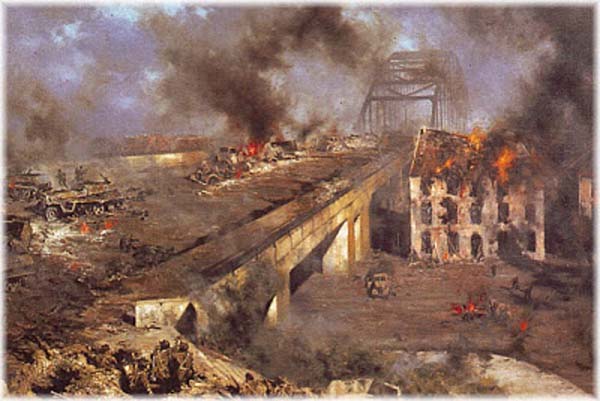
Rather than regale you with memoirs of how we (Ze Grrrrrmans) pushed no fewer than 30 burning wrecks of Cromwells into the Waal from the bridge at Nijmagen to allow the glorious advance of KG Hummel and the 107. Panzer Brigade.... our campaign hand-holderer Mike Haught has done that for you over at his excellent gaming blog. Here's a link:

http://www.scarybiscuitsstudios.com/2014/10/highway-to-reich-dramatic-tcow-fsmg.html


I'd like to say a huge thanks to all involved in the campaign. Not a bad effort! Roll on the next one!


ICH!!!!

Wednesday, 22 October 2014

Official FlamesCon 2014 Results

With the regular Thursday update to the FoW site, the official results are in! You can read all about it in the link below and there's some great photos capturing the action.

http://www.flamesofwar.com/hobby.aspx?art_id=4650


Monday, 20 October 2014

So many games, so little time #3: Simple painting to good effect - Part 3

Here we are back for part 3 which I will go over the picking out the detals & leg armour plates. Decals & weathering will follow in another part shortly.

So the main body of the walker is done but there are armour plates on the legs which have not been given any love as yet.

For these I did the same technique as the the main body where I sprayed them with the Red Brown all over, put in a large Green Grey area, thin line of Yellow Ochre to separate the 2 other colours then a final touch up of any over spray.


Next up I needed to define the details on the miniature as looking at it from any distance you just see a mess of colours from the camo. I know this was kind of the point of camo BUT this is a scale model remember and you do want to be able to make out what you are looking at.

The method I decided to use is called pin-washing, instead of slathering wash over the entire mini with a large brush which I have tended to do in the past I applied the wash just to the recesses with a thin brush. This was far more time consuming having to work around every panel joint but the colours of the model remained far more vibrant than if the mini had been bathed in a wash.

The paint I used was the Army painter ink "Dark Tone" which is just amazing and the Army Painter Inks are now my go to washes.

Here you can see the first part of the walker that I pin-washed vs the other arm which has yet to have it done. Hopefully you can spot which is which!


Here is both of them having been pin-washed.


Next up I did the same pin-washing to the main hull.


Which when you put them together you get.


Lastly I finally attached the leg armour plates that I talked about right at the start and the mini is looking nice and factory fresh, ready for unit markings and some wear and tear added (but keeping that new walker smell).


The final part where I do the decals and weathering will be up soon.